Pretty much, I just want to say, "I love making things!" I usually don't succeed, and then I am disappointed... but still... I get a certain kind of joy that is difficult to explain when I have made something that I like, it is different than when you buy something you like. The fun is in the process... in making some really not-so-great stuff, and then finally triumphing.

Friday, February 27, 2009

Here is a little something I just finished today. I got this old window about a week ago at a local antique store for $10.00. I fell in love. I'll probably end up going back and getting a few more... but anyway... I couldn't decide what to do with it. Finally, I decided to make this collage. It is stamps and things from meaningful letters that I've been carrying around for years- I didn't want to throw away the envelopes, but hate storing things, even sentimental things that have no purpose now. So, here's the final product... a bit of meaningful, and re-purposed art. :)

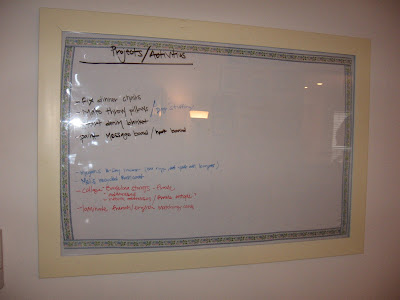
I also had an idea concerning white boards awhile ago. I hate white boards. Let me clarify, I hate the way they look- but love the functionality. I'd also taken up leaving a dry erase marker in my bathroom, ( for whatever reason all my ideas come to me as I'm getting ready for the day...) so as my ideas come, I just write them on the mirror. This got me thinking-- why not just get a frame I liked, and use that as my whiteboard.
This is the frame I got-- it's huge, and not too cute, but I liked it. At first I just took out the back, and hung it, so you could see the wall.... but it was too bland... so then I took and old tablecloth, cut it to the right size, and sewes ribbon around it to give it some style... and then framed it.
I like it much better ... but now I don't like the colors of my markers, or my handwriting. Oh well. I'll leave it for now.

My last picture is of another $10.00 antique mirror... oh sigh... now what for this rugged beauty? I'm still not sure... perhaps a black and white collage of my favorite pictures? Vintage material? I love using meaningful, sentimental scraps of my life... but we'll see what happens. All I know is, she is perfect...


Sunday, February 22, 2009

At long last! how I stencil...


To stencil/stamp a t-shirt, onesie, bag, whatever... here are the items you'll need:


t-shirt or whatever, blank
image you want stamped, ( silhouettes are easiest)
blank stencil transparencies
stencil sponge or makeup wedge
x-acto knife
tape
fabric paint
cereal box cardboard or something similar
surface to cut on- I use a self-healing mat


First of all... this is how I do this--but there's more than one way to do things! This is all about being creative... if you can think of a better way of doing things- or a better tool or something, try it out! More likely than not, you'll be glad you did!

Now you take your image, put it on your cutting surface, and then put your stencil transparency over the top. Tape them together so they won't move.


Then, take your x-acto knife, and cut out the black of your image. This is where your paint will go.


Put your cereal cardboard, or whatever, even another piece of paper inside your shirt so the paint won't leak through to the other side. Tape on your stencil where you want it to go.


Then take your stencil/ stamp sponge thing. It has a blunt top. Dip that in your fabric paint, and dab or stamp your stencil. I hope this makes sense... don't do strokes, as your stencil is only taped on, just stamp the paint directly on, or your image will be totally smudged.


Here is what it will look like.


Then carefully peel your stencil off!


TA DA!

If you don't want to use transparencies, you can also print your image directly onto cardstock, and cut that image out with your x-acto knife, and use your cardstock as your stencil. You can still re-use it a few times too.
Now of course, this is the very basic. Once you understand the basic idea though, a whole world of possibilities is at your fingertips.
Some inspiration for me on this project and many more come from the following 2 sights that I LOVE LOVE LOVE.
littleblackkitty.typepad.com/
check out her self portrait stencil tutorial, and everything else! This lady is AMAZING!
also, theartfulparent.com
check out freezer paper stenciling! So awesome! I haven't tried it yet because I haven't found any freezer paper.... and because you can't use your stencils over and over... but still, in many ways this would be SO much easier!


Sunday, February 8, 2009

my favorite...


I know I said the next post would detail a "how-to" for stenciling... and truly, that is coming, though it's pretty self-explanatory... but I also said, in my very first post, this would also be a place to put little happy tidbits...

Here is a copy of two of my favorite pages from My Little Golden Book About God.
These two pictures pretty much sum it up for me. :)

Monday, February 2, 2009

up-and-coming...

stay tuned... I will soon be posting a "how-to" stamp/paint/dye, whatever.... onesies and kid shirts photoed.
Humm... though now that the pictures are uploaded they don't look so great. You see, for me, I like the unpolished look- the smudges on the borders etc.... though maybe I'm alone on this. At any rate- I'll tell you how I do it- maybe it'll give you some even BETTER ideas-imagine. :) This all to come next time.


Earing Hanger with Ribbon


More picture of the project below-this time hanging from a ribbon, with even more ribbon tied to that ribbon.
A close up of the ribbon, and how I attached it to the frame- with small screws.
A picture of the back of the project so you can see how I glued it. So easy.


Earing Hanger


For this project you need:

screen ( comes in a HUGE roll at Lowes and Homes Depot for about $6.50... I used aluminum screen)

open frame ( you won't use the glass)
glue gun or heavy duty stapler


I got stole this idea from the same friend who made the fabulous sock monkey, crafty girl. :) This is very easy.


Cut the screen to be a little bigger than your frame, and glue it in. Ta-dah!

Hang it in your bathroom or bedroom--jewled with your earings... it looks like art- and that's what it is.
If you'd like, hang it with ribbon--jazz it up a bit.

intimidating....

Whew... here we go. Writing the very first post is intimidating to me. I have so much to say... so many projects to post, and I'm not even clear yet what I want this blog to be about exactly. Pretty much, I just want to say, "I love making things!" I usually don't succeed, and then I am disappointed... but still... I get a certain kind of joy that is difficult to explain when I have made something that I like, it is different than when you buy something you like.
The fun is in the process... in making some really not-so-great stuff, and then finally triumphing.
I hate writing... so I won't be doing much of that. I just want to share some of my projects, which are, and will continue to be easy because I only really enjoy making things that are quick, with fast, viewable results.
Then maybe others will like to try them too, assuming there are others like me out there somewhere. Then, if I'm really lucky, these others like me will have ideas of their own they will share with me-and we will all benefit and be happy. :) And... I will also share happy little tidbits of whatever comes my way, for fun. Now knowing the nature of this blog, pretty please leave your comments, suggestions, projects, links, etc. for me to ponder and try myself.